
Upon completion of this lesson, you will understand the various options for billing dues.
There are 3 options for billing dues.
- Bill dues manually thru the Invoice/Credit memo screen. This method is generally only used for special cases.
- Bill dues through the Dues Billing screen. (instructions shown below)
- Schedule an automated dues job. Contact Time Sync to do this.
There are also various options for how the dues get paid.
- Charge dues directly to a credit card or eCheck. In order for a customer's dues to be charged directly to a credit card or eCheck, the user must designate this method as specified in the following article: http://support.timesync.com/entries/175159-Lesson-1-Adding-Electronic-Payment-Accounts-e-g-Credit-Card-eCheck. If customers are not assigning a payment preference, there are 2 possibilities for getting this done. (a) A user can be redirected to the screen where they assign their payment preference with a note to do so. This would happen every time they log in until they have completed this task. Or,(b) an automated job can be run to assign available credit cards for those users that have not specified an electronic method. Be sure that your customer agreement allows you to do this.
- Put dues on account for user to pay later.
Instructions for billing dues through the Dues Billing screen
1. For all 3 scenarios above, you should first make sure that the appropriate dues amounts are specified. This can be done in the User Billing screen. To get there, select Admin >> User Mgmt >> User Profiles. Then select the Billing tab and the user.

2. From that screen, you will see the dues amount for a given user. If changing the dues amount, be sure to click the Save button before leaving the screen. The system can also be configured to invoice dues by dues item, which would allow specific dues rates to be set up and assigned to users. A change in rates could then just be updated in the item screen instead of each user.
Note: If you need to make a bulk change of dues for all users, contact Time Sync.

3. Once dues rates are set as desired, you are ready to invoice dues. Most customers are set up for an automated job. Let us know what day of the month you want this run. If your dues are automated, you can ignore the rest of these steps.
If you want to run manually, you can do this from the Dues Billing page. From the Schedule Master default page, select Billing Admin >> Batch Invoicing >> Dues Billing on the main menu.

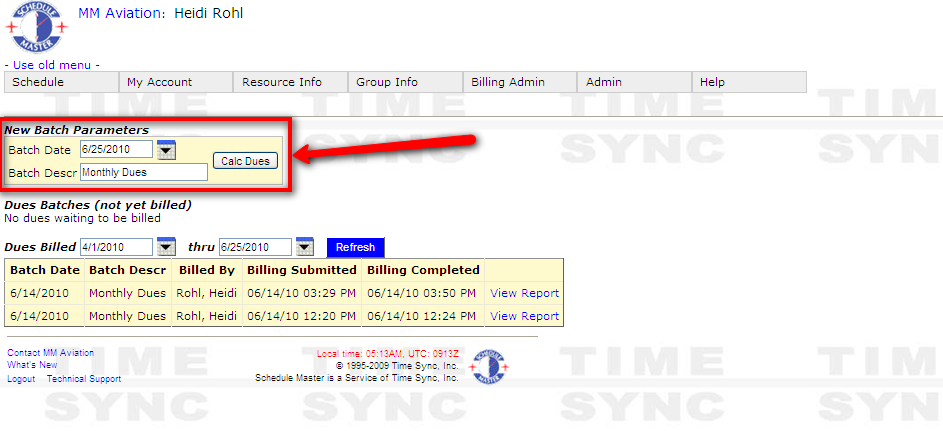
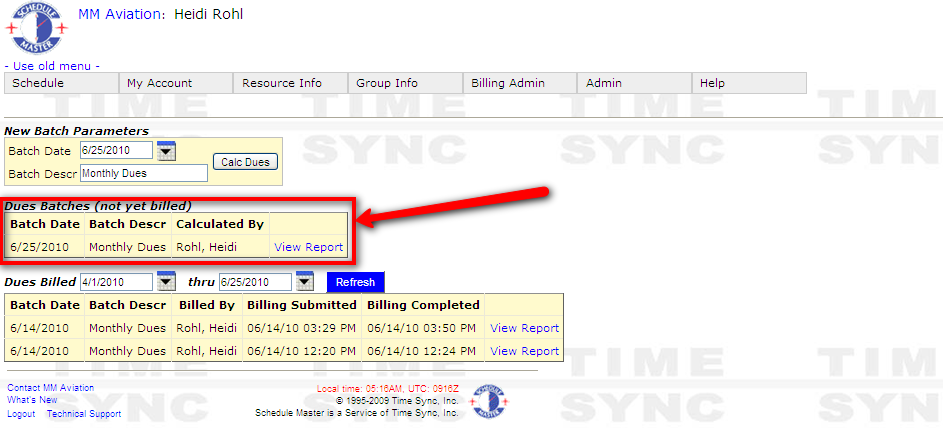
5. Once the dues have been calculated, a new row will show under Dues Batches (not yet billed). Click on the “View Report” link to open the report and review the dues amounts.
5. You can click on the plus signs next to the number of each group of dues to see which users have that amount of dues. If everything looks OK, click the red ”Bill dues” button. This will add the dues invoices to the user statements. If the user has a payment preference for dues set to credit card or eCheck, the charge will also be made at this time.

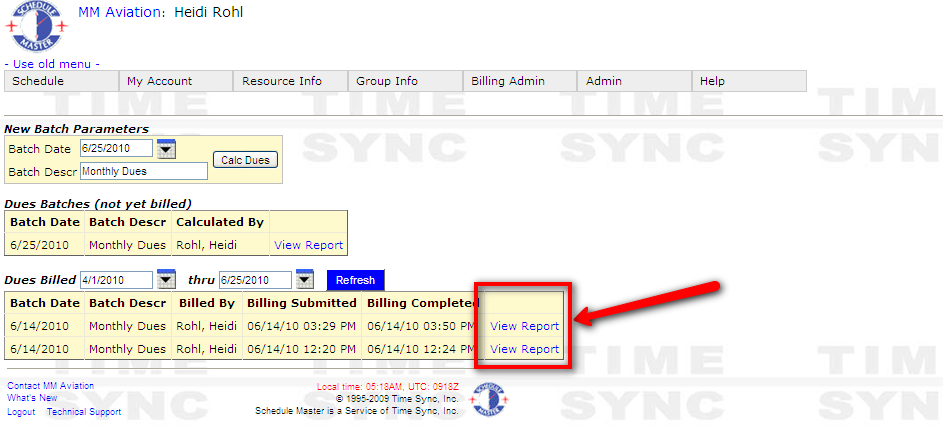
6. Once the dues invoicing is done, a new row will show up under the "Dues Billed" section. To review the final status of the dues by user, click on the corresponding “View Report” link. This report will include details about payment of the dues, such as which users had the dues charged to a credit card, which ones went on account, and which had no dues charged.
Comments
0 comments
Please sign in to leave a comment.